Mercy Corps
Southeast Asia Earthquake
Dept. W
PO Box 2669
Portland, OR 97208-2669
800-852-2100
www.mercycorps.org
Northwest Medical Teams
SE Asia Disaster Relief Fund
PO Box 10
Portland, OR 97207
800-959-4325 (HEAL)
www.nwmedicalteams.org
MSNBC has done a good job of pulling the satellite pictures of the earthquake/tsunami impacted areas into a format that allows you to really grasp the destruction.
Wednesday, December 29, 2004
A better use for money - Donate to NW groups helping tsunami victims
Throwing money at the problem
Hog tying I can handle, but bow tying is another matter...they go wonky on me several times before I can make them passable. One way around this is to secure the ribbon with something other than a bow. In this case I used an asian coin (origins unknown)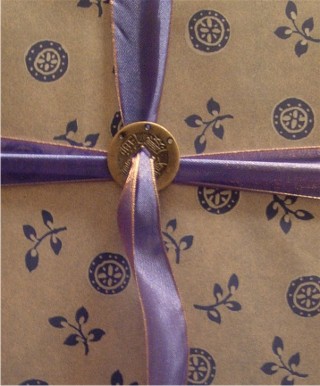
Here's how the full package looked.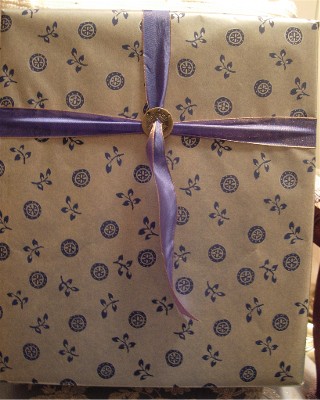
Sunday, December 26, 2004
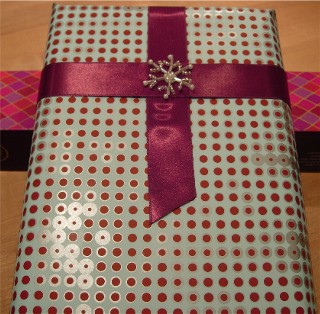
Scrappy Ribbon
Because of my organizing challenges, I often have the chance to get creative. I'll have a lovely piece of ribbon that's just the right shade and texture, but a bit too short to wrap and tie a bow for my package. Here's a sneaky trick...just do a partial ribbon wrap. For this package I tied it in back and pulled the ribbon length to the front and affixed it with a glue dot. I finished the front with a Jolee's Boutique snowflake sticker. I then trimmed any excess ribbon off the knot in the back.
Friday, December 24, 2004
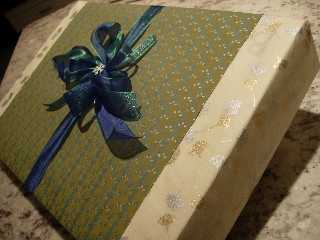
Scrappy Wrap
Seems like I always have loads of lovely scraps of paper left over from wrapping other presents. Purty as they are, they just aren't big enough to wrap a whole gift. So I do what any self-repectin' scrappy lady would...I cheat. I find 2 (or more) papers that look good together and work with it. In this package I only had enough of the gingko leaf paper to cover the ends and only enough of the green paper to cover the middle.
Thursday, December 16, 2004
This time next year?
More evidence that gift-wrapping can be profitable. The person won $10,000 in the Scotch 3M gift wrapping contest.
More photos from the 3M "America's Most Gited Wrapper Contest"
Thursday, December 09, 2004
Gift Wrapping as a Career?
This firm in the Czech republic wraps gifts. They also offer gift wrapping courses. Here's one of their more tasteful packages.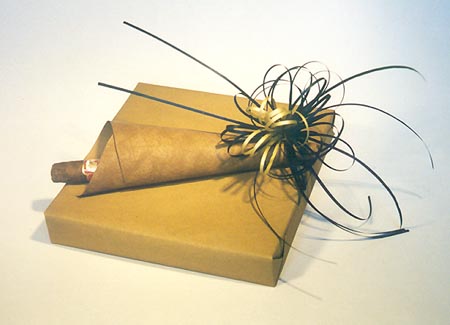
![]()
![]()
Thursday, December 02, 2004
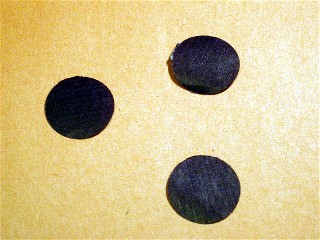
Dot 2 Dot

Another variation on the dot wrap. This time the package includes ribbon and a little copper monogram purchased at a scrapbooking store.
Dot to dot - another ribbonless wrap
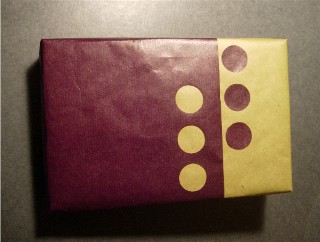
Grab yourself some cheap wrapping paper (the stuff I used is from Ikea) and a 3/4-inch Marvy hole punch (or whatever punch you have) and save the ribbon for your hair. Here's how to wrap this...
And here's another variation on this wrap
Thursday, November 25, 2004
I feel pleaty...oh so pleaty

This a good one for the perfectionists out there. They will have much tidier pleats than I did on this one. Some alternate views of this wrap.
Materials used:
- plum mulberry paper
- scraps of pearlized tissue paper for flowers and pleat accents
- tape/glue/glitter glue
- Flower Paper Punch
Thursday, November 18, 2004
The Running Stitch Wrap
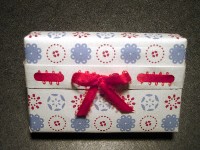
One of my favorite easy wraps. All you need are the ususal suspects (paper, ribbon, and tape) and a hole punch that makes a hole large enough to thread your ribbon through. More about how to wrap this...
Tuesday, November 09, 2004
Simple Net
Materials used:
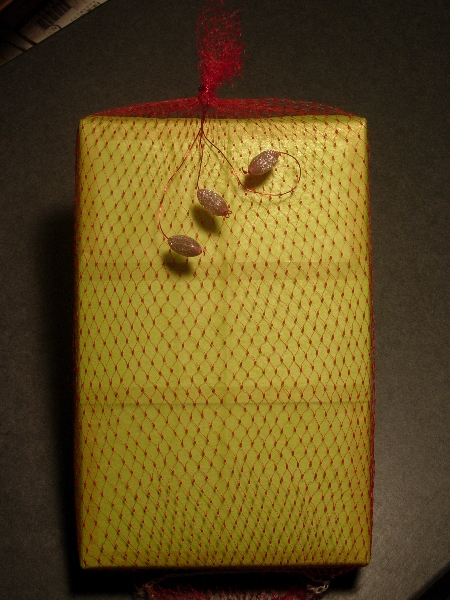
- shimmery green tissue for underlayer
- red produce net over tissue
- red beading wire
- vintage beads
Monday, November 08, 2004
What's Trixiebeth doing here?
I love the art of wrapping gifts and haven't had much luck finding much about it on the web. Years ago I lived in Japan where gift wrapping truly is an artform. Store clerks held me spellbound as I watched them adroitly wrap an entire box using just one piece of tape. How did they always start on the diagonal and end just at the right spot?
Most of the discussion on the web is around the waste of paper. I'm interested in fresh ideas (green and otherwise). I also like the idea of wrapping the impossible; like a vacuum cleaner. Or disguising easily identified gifts, like CD's.
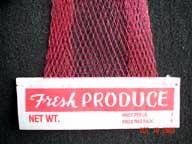
I like using left over materials, like these plastic net produce bags.
I'm working on a couple projects that I'll post as soon as they're done and I have some decent images.
Saturday, November 06, 2004
Thursday, October 28, 2004
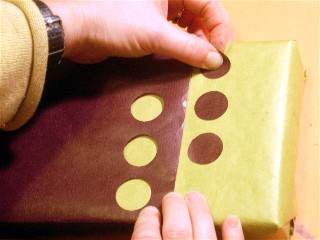
Dot to dot - the hole story
Step 1:Wrap the under layer (the green paper on my package). You do not need to wrap the entire package, you can wrap it just to the point where the top layer will overlap by approximately 1-1/2 inches or so (depends upon how big your paper punch is).
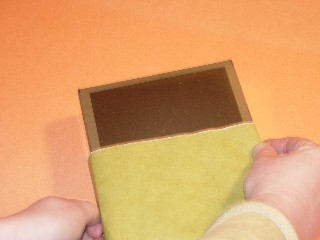
Step 2:Fit the top layer over the bottom layer,making sure that you have ample overlap for your paper punch design. DO NOT tape it into place, but make plenty of crisp edges so it will be easy to fit it into place later.
Step 3:Remove the top layer and punch your designs onto the edge of the paper that will be on the top of the package and will overlap the bottom layer.
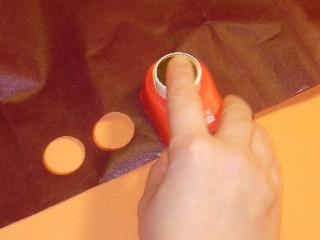
Save the designs that you punch out and set them aside for use a little later.
Step 4:Now fit the top layer into place. Secure with tape under the package and on the side.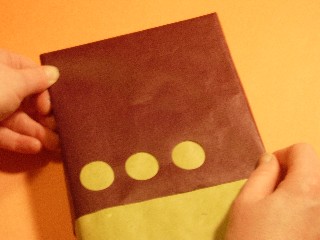
Step 5:Align the dots as you like and secure with a bit of glue.
Monday, October 18, 2004
How To Wrap the Running Stitch Wrap

Step 1: Leaving enough overlap to make a fold to your liking, fit paper around object you're wrapping as you normally would, except overlap the two edges of the paper on the top surface of your package rather than the bottom of the package. Anchor the paper to the object with a piece of tape, but leave the rest of the taping until after all the threading is done.
Step 2: Take the end that overlaps and neatly fold over so that the back side of the paper is exposed. Fold all the way across so that the fold will continue down the sides of the package. Package in this picture has about a half-inch fold.
Step 3: Using hole punch make holes. Can be evenly spaced or some other pattern.
The package is now ready to thread. Remember, don't tape the edges down yet but make sure you have clean sides, you can neatly trim them if you need to.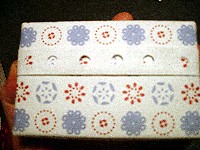
Step 4: Cut a length of ribbon that will fit around package with room to tie a bow.
Step 5: Center ribbon under package and use ends to thread through both ends of the package. I like to make sure the ribbon goes from the outside to the inside of the first holes on the sides.

Here's what the back and sides look like:

Step 6: Tie a bow where ribbon ends meet in the middle of the package. Trim ribbon as necessary. Add tape to anchor the sides. And it's done!
Friday, October 01, 2004
Such a pleaty thing

Pleaty - with three flowers vertically aligned.

Pleaty - with three flowers horizontally aligned and a spot of glue showing because I flip-flopped on the issue of flower placement.
Subscribe to:
Posts (Atom)